
There are two integration workflows you can leverage to seamlessly pass property data, sketches, damage photos, and virtual walkthroughs (if applicable) from Hover into Xactimate. Both workflows are available for Web, Desk, and Mobile.
Start in Hover - Scan the exterior or interior of a property while on site, then import the data into Xactimate using the "Request Data" dropdown.
Start in Xactimate - Initiate a new Hover project from within Xactimate, scan the property, then import the Hover data into Xactimate via the same "Request Data" dropdown.
This workflow can be used to invite a professional partner or policyholder to scan the property.
This article will cover the "Start in Hover" workflow where you will import an existing Hover project into Xactimate. View this article for details of the "Start in Xactimate" workflow.
Before you get started
Make sure your Hover and Verisk accounts are fully integrated. Activation requires two steps:
Step 1: Complete this form to request activation on the Hover side. Please have the following ready:
Verisk Account Number (or Carrier ID)
Xactnet Address
Default user in your Hover account (email address)
Step 2: After submitting the form, enable Hover within Verisk/Xactimate Admin.
Follow Verisk’s step-by-step instructions.
Course: Import a Hover project into Xactimate
Take advantage of this short (10 min), interactive walkthrough to learn how to import an existing Hover project into Xactimate.

Click the expand arrows below to reveal more or collapse information.
Steps for Xactimate Desktop (X1)
1. Scan the property in Hover, as usual
1. Scan the property in Hover, as usual
In this workflow, you will import an existing Hover project into Xactimate.
Once you receive the notification that the Hover project is ready, open Xactimate and navigate to the Local Projects page to import the project data.
2. Click the "house icon" and then "New Order" in Xactimate
2. Click the "house icon" and then "New Order" in Xactimate
Highlight your project by clicking on it
Click the house icon on the right side of the screen
A pop-up window titled “Request Data” will appear
Select New Order then click Next

You'll be automatically redirected to the Xactimate Data Request website to complete the service request and may need to sign in with your Verisk account credentials.
3. Select the service
3. Select the service
Choose the desired service from the provider drop-down list. It should match the deliverable ordered from Hover:
Use Roof for Hover roof-only measurements
Use Roof & Walls for Hover complete roof and exterior measurements
Use Interior Walls for Hover interior floor plans/measurements

4. Confirm the claim information
4. Confirm the claim information
Validate the information for the request is correct
Pay close attention to the claim or lead number since that needs to match between Hover and Xactimate for the integration to work successfully

5. Confirm the contact information
5. Confirm the contact information
Validate the contact information for the claim representative and property owner
Pro Tip: Ensure your contact information is entered correctly in the claim rep field in your Xactimate preferences (preferences > project > personnel > claim rep). That information will automatically pre-fill later when you request property data.
Confirm the primary contact. In this workflow it should reflect your contact information.
Click Submit

Once submitted, you will immediately see a notification at the center of your screen that says: "Request Submitted" and the order details will auto populate under the Order History heading on the bottom of the same page.
At this point Xactimate will automatically match your request with a finished Hover project and you are ready to import the Hover data and photos into Xactimate.
6. Click on the "pencil icon" to edit the project
6. Click on the "pencil icon" to edit the project
From the Local Projects screen, highlight your project by clicking on it.
Then click the pencil icon the right side menu.

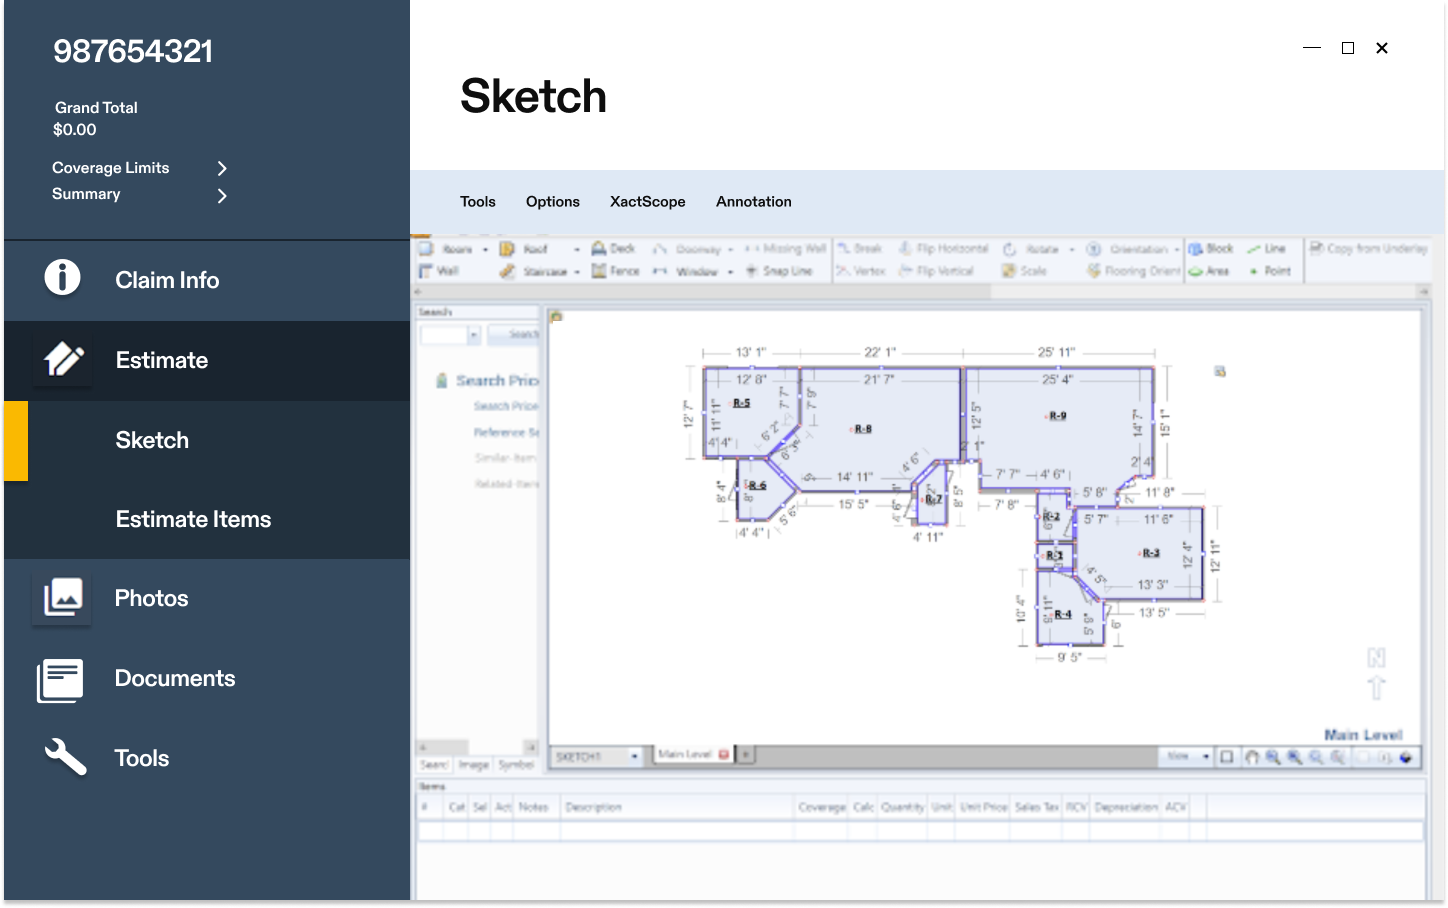
7. Open the sketch tab and import selected data
7. Open the sketch tab and import selected data
Under “Estimate” choose the “Sketch” tab and click the import icon (roof sketch image)
You’ll see the available Hover files that match the requested data for the lead or claim number. Select which records to import.
Click Import

Once imported, the plan(s) will be unlocked in Xactimate for editing.
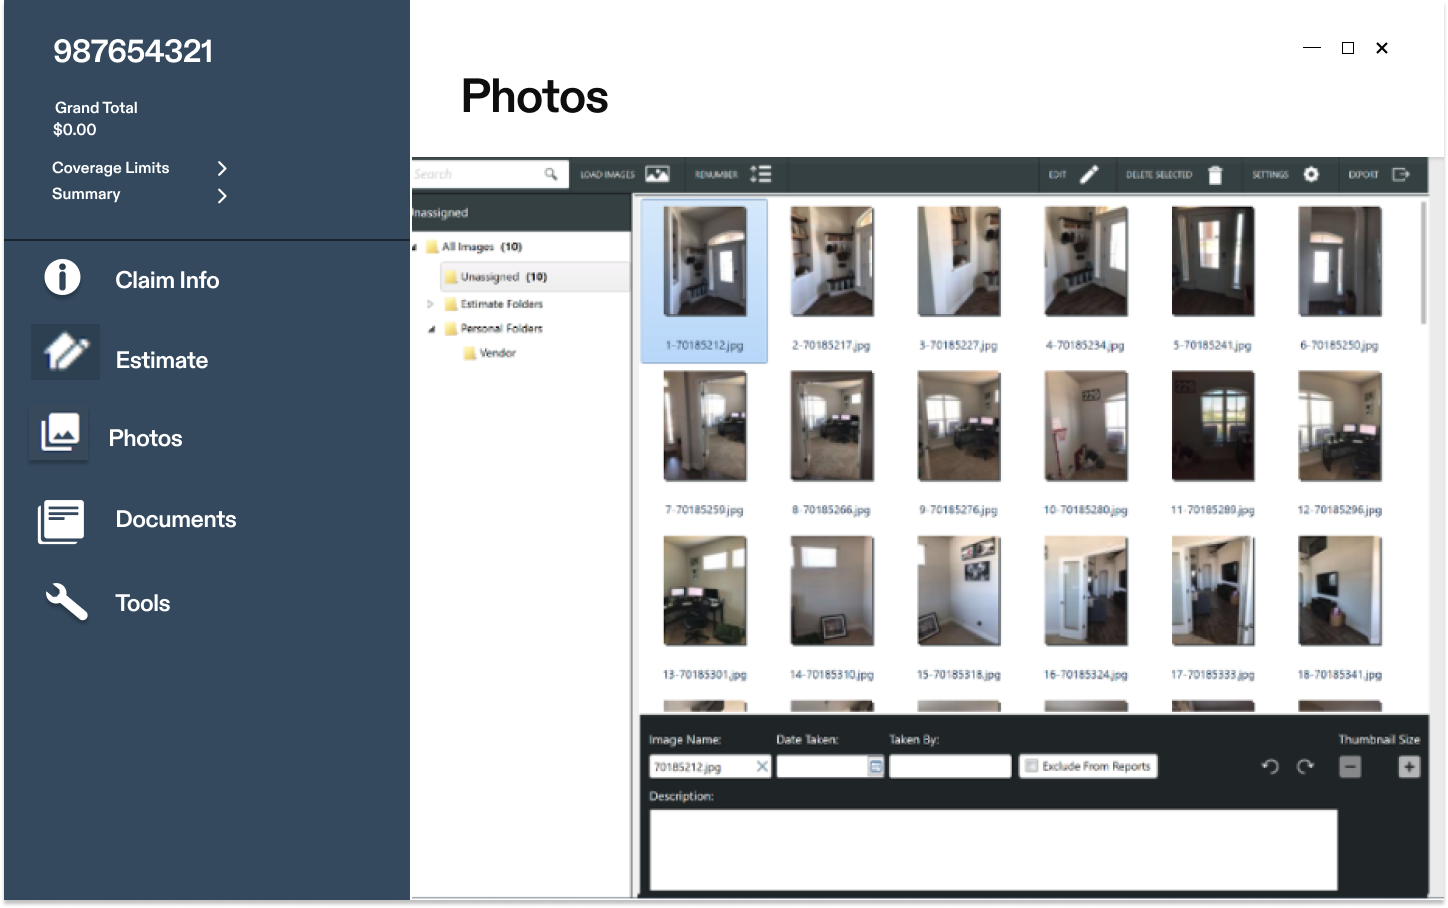
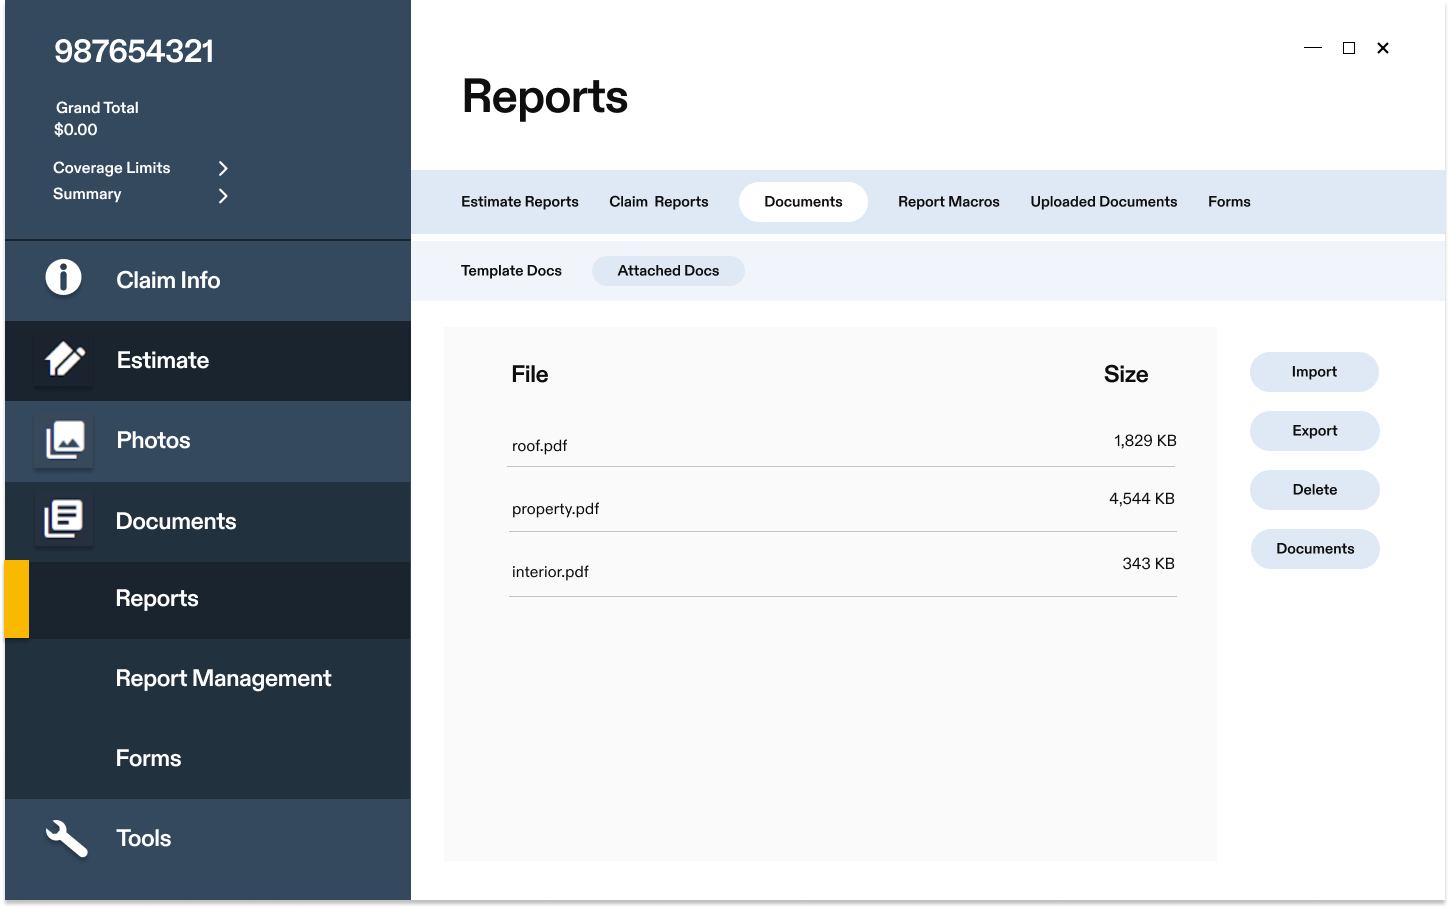
8. View the sketch, photos, measurement pdf, and more
8. View the sketch, photos, measurement pdf, and more
The Hover 2D/3D sketch and measurements will import into your working estimate.
See all the imported photos in one place (including damage and annotated photos, if applicable)
Go to the the "Documents" tab and then “Reports” for the measurement file(s).
Xactimate Online (XOR)
There are a few difference in how you request data in the Xactimate Desktop and Online versions. There are no differences in how you will import the Hover data.
Review the information below to see the differences in requesting data.
Confirming the request data details
Confirming the request data details
Once you click the house icon to request data, a pop up window entitled "Request Data" will appear
Choose the desired service from the provider drop-down list:
Use Roof for Hover roof-only measurements
Use Roof & Walls for Hover complete roof and exterior measurements
Use Interior Walls for Hover interior floor plans/measurements
Validate the data for the request is correct
Pay close attention to the claim or lead number since that needs to match between Hover and Xactimate
Click Submit
You will immediately see a notification at the bottom of your screen that says: "Your request was processed successfully"

Verisk Support Contact Information:
Monday - Friday 7:00 AM - 9:00 PM EST
Main Toll-Free #: 1-800-888-4476
Verisk can also be reached via live chat through their help portal